REDCap: Record Identifiers and Renaming Records
Record Identifiers and Renaming Records
In a REDCap project, every record must have a unique name (also known as an identifier or ID).
When you create a new project, REDCap will automatically create the identifier field record_id. This field is always the first field on your first instrument; if you reorder your instruments then it will automatically move to the top of whatever your new first instrument is.
The identifier field can't be deleted or left blank, and its type must be Text Box (Short Text).
Auto-Number vs Custom Record Identifiers
REDCap's default behaviour is to assign ascending integer IDs i.e. the first record will have ID 1, the second 2, and so on. If your project has a public survey (where the first form in your project is a survey, that can be accessed by a static survey URL), this default behaviour is also mandatory.
However, if your project does not have a public survey, you can choose to use custom identifiers instead by disabling record auto-numbering (Project Setup > Enable optional modules and customisations):
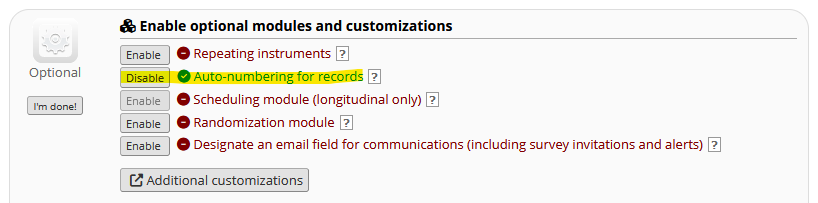
Custom identifiers need not be integers - they can be any series of characters e.g. "ABC-123", "John Smith", "51ed4edda8483b" etc., but again they must be unique within the project. With custom identifiers, you will be required to enter the ID at the time the record is created, whether via Data Collection > Add/Edit Records: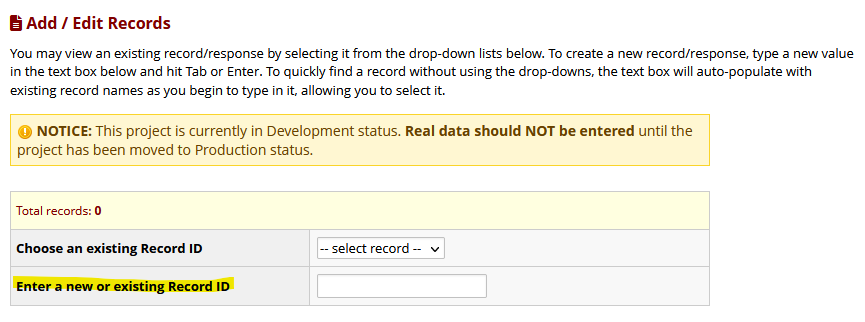
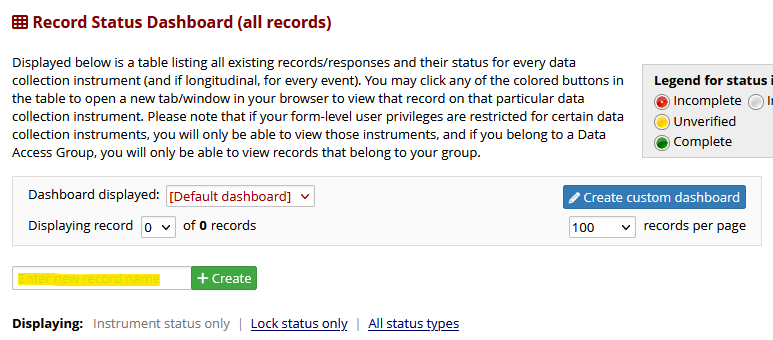
-or Data Collection > Record Status Dashboard:
 If you want to use an existing known identifier for your project participants (such as their email address or hospital UR Number), then custom record identifiers are how this can be achieved.
Data Access Groups
If your project uses Data Access Groups (DAGs) and auto-numbering, and you create a new record, then the ID assigned will vary based on whether you, the user, are a member of a DAG.
For users not assigned to a DAG, the record will be assigned an ascending integer ID as normal.
However, for users in a DAG, the record's ID will instead be of form DAG identifier - ascending integer e.g. "123-1". (Just like a project record, each Data Access Group you create has a unique ID, which you can see listed on the Applications > DAGs screen).
To the user inside the DAG, only the ascending integer portion of the ID will be visible. So they will see records 1, 2, 3 etc. But, users with no DAG assignment will see the full ID 123-1, 123-2, 123-3 etc. This behaviour is part of how REDCap silos data, so that users in a given DAG have no idea how many other records have been created by other sites.
See the Training Videos > Basic Features & Modules > Data Access Groups
for multi-site projects video accessible from within REDCap for more information on what Data Access Groups are and how to use them.
(DAGs have no effect on custom-named records, which must be globally unique within the project. If a user in a DAG attempts to create a new record with an ID that is already in use for a different record that they can't see — because it's in a different DAG/no DAG at all — REDCap will display an error and prevent the record from being created.)
Renaming Records
It's possible to rename records i.e. change their record ID, including when the default auto-numbering is enabled.
There are a number of reasons why you might want to rename a record:
- You are using custom record identifiers and made a typo in the ID.
- You are using auto-numbering but want to start numbering from an integer other than 1.
- You are using auto-numbering and have deleted a record, and you don't want to leave a gap in your record list. (Note that I do not recommend this in general, as it makes it harder to track things in your project's audit log - see the next item! Also, because this must be done manually, one record at a time, it is prohibitively laborious if you have a large number of records that will need to be renamed).
- You have deleted a record but want to filter on it in the audit log (as described in step 3a of our Recovering Deleted Data how-to).
Instructions
- Log into REDCap and open the project that has a record you wish to rename.
- Ensure that you have the necessary User Right (the "Rename records" permission). Notably this permission is not enabled as part of your default rights, even where you are the project owner. (If you don't have permission to view and edit your own Rights, you will need to ask the project owner to grant you the "Rename records" permission).
- Open the record in question, either via the Add/Edit Records or Record Status Dashboard screen.
- Near the top of the Record Home Page, there is a drop-down "Choose action for record". Click on it to display the possible options:
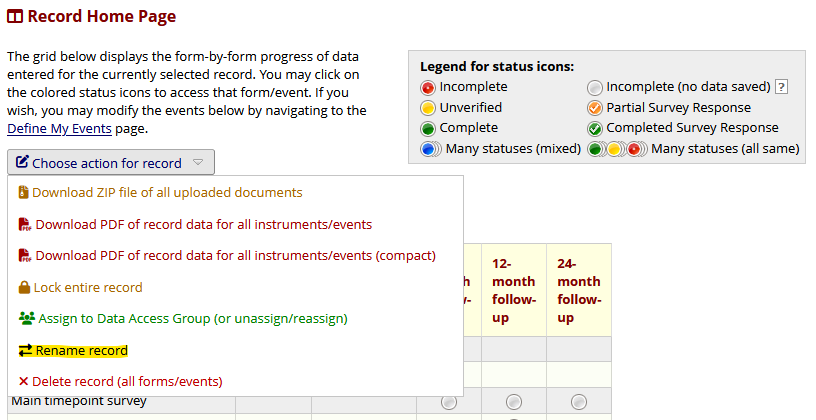
(You may not see all of these options, depending on your User Rights. If the Rename option is not present, you will need to amend your rights as per step 2). - Pick "Rename record" and enter the new record ID in the dialog that appears:
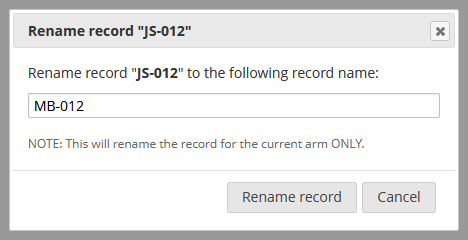
(If your project uses auto-numbering, you will only be able to enter an integer ID). - Hit the Rename record button and you are done!